How to Easily Compile Report Card Using Microsoft Excel Result Template
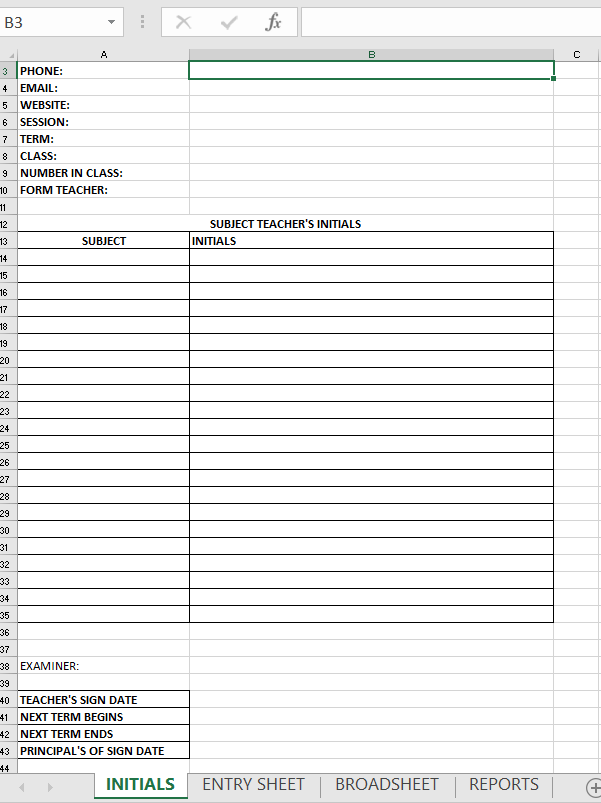
The Automated Result Compilation Excel Template has four sheets. The first is the initials or initialization sheet. This is where you enter general details that will be used throughout the system.
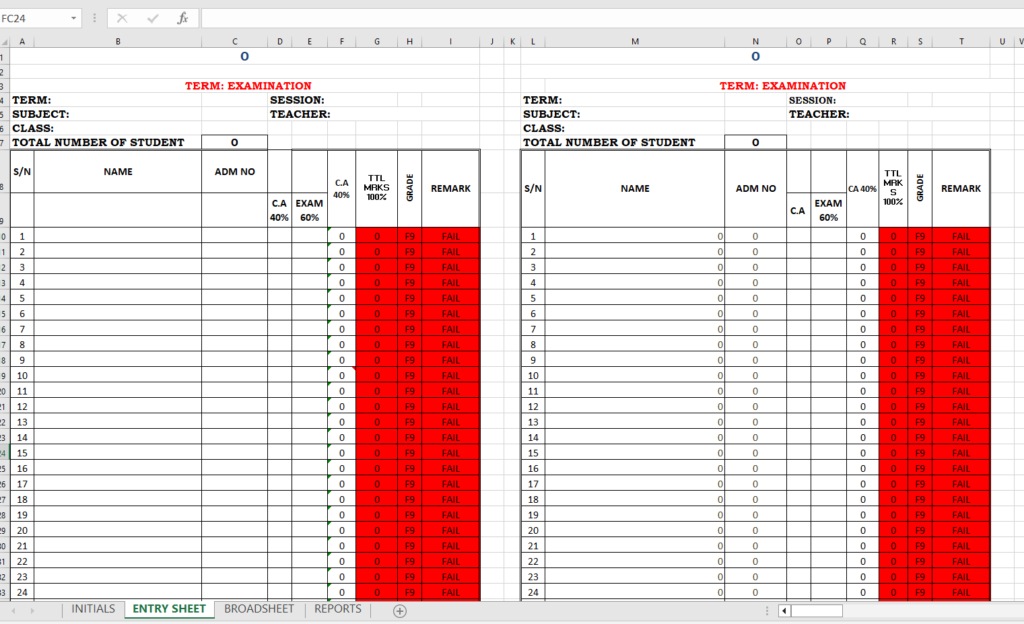
The second sheet is the entry sheet. It is the sheet in which you enter the records and scores of the individual students whose results you want to compile.
Number three is the broadsheet. The broadsheet contains the summary of the entire results. It also contains a summary of each student’s performance.
Finally is the report sheet. This sheet contains the automatically generated report cards for all the students.
Opening the Microsoft Excel Result Template for the first time
The first time you open the Microsoft Excel Result Template after buying it, you will see labels without any record. For instance, in the initialization sheet, you will see labels like the name of the school, address, subject, and teacher’s initials among other things.
In the entry sheet, you will see labels for the names of students with the respective Continuous Assessment (CA) and Examination scores for each subject but without a record.
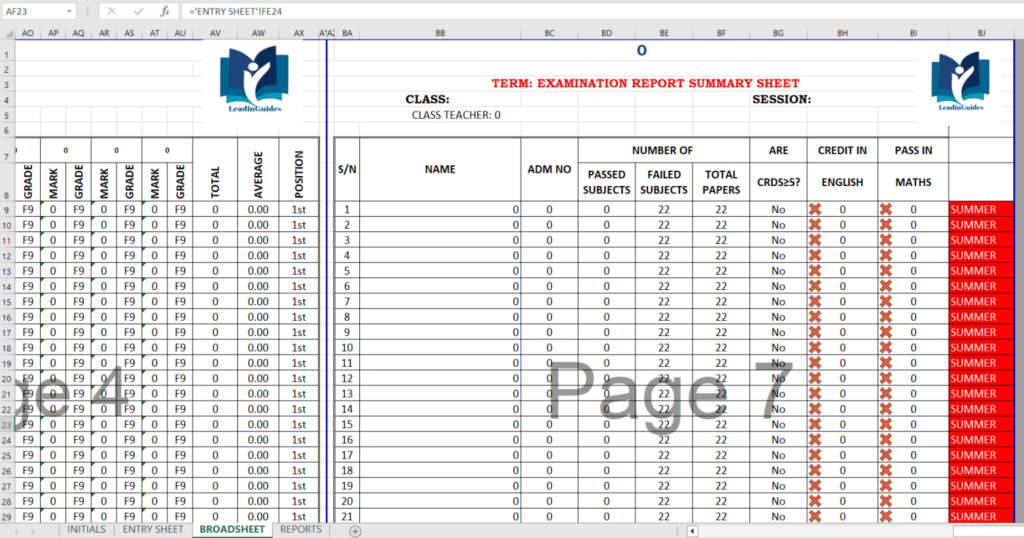
Similarly, the broadsheet shows summaries without any record. All the students score 0/F9 in all the subjects. Everyone comes in the first position with a zero average. And having failed all the subjects including Mathematics and English, the system recommends everyone for a compulsory summer program.
Finally, the report cards generated bear neither any student’s name nor photograph. The subjects are not even listed on the report cards yet.
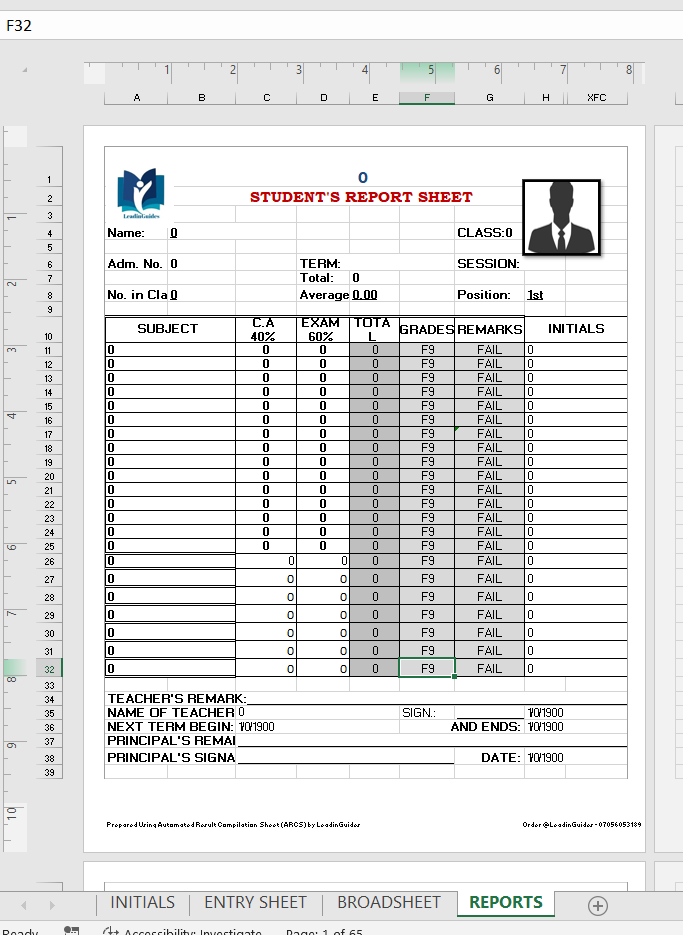
In summary, everything looks uglily scanty the first time you open the template. But everything will be automatically populated as you enter the records to give you clean and professional report cards.
Let’s see how we do that.
How to Compile Report Card Using Microsoft Excel Result Template
The first step to compiling a report card using the Microsoft Excel Result Template is to enter the general details for the system. The general details display across the entire report. To do this, click on the “Initials” sheet and fill in the details for which you see labels.
Note that as soon as you type in the details, it automatically gets populated into the relevant areas in the other sheets.
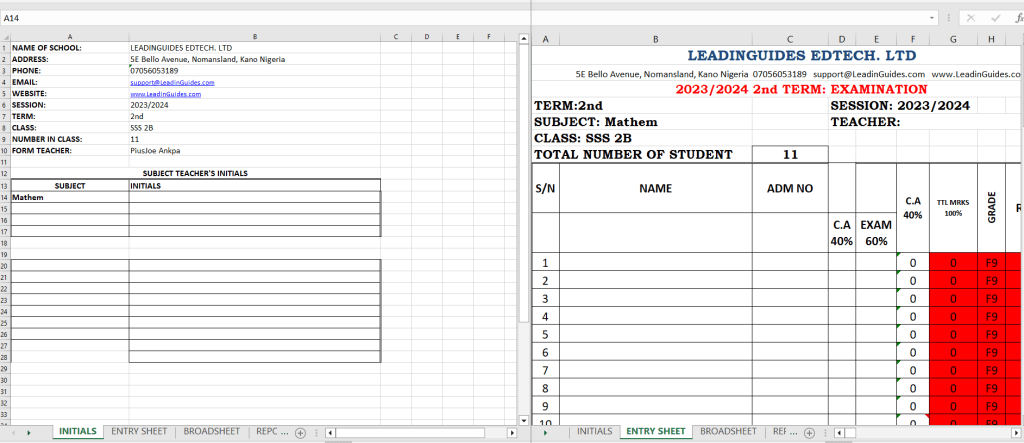
Once you have finished entering the data in the initials sheet, proceed to the entry sheet.
Once more, the entry sheet is where you enter the scores for the individual students. It has Continuous Assessment (C.A.) and Examination columns for each of the subjects offered. The system can accommodate a maximum of 22 subjects.
Note that you will most likely not need this many subjects. In that case, only enter the subjects which you offer.
More so, individual teachers can enter their scores by themselves. If this is the case, you can grant teachers permission to enter scores only for the subject (s) they take.
Broadsheet and Report Sheet
As you may have noticed already, the broadsheet and report sheets are auto-generated. Once you or the teachers have entered the scores, you do not need to do anything else. The system will generate the broadsheet and report cards for all the students automatically.
Changing your school badge and Student’s Photograph
After generating the report cards, you may need to add your school badge and the individual student’s photograph. Doing this is simple.
First, right-click on the badge or photo you want to change.
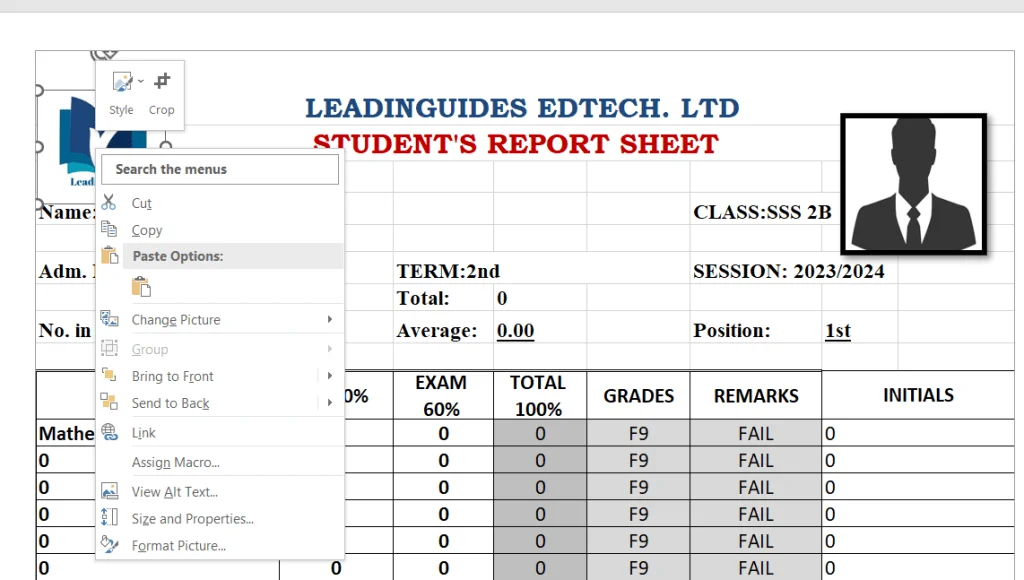
Then select “Change Picture”. Locate the picture you want to add, double click on the picture. And that is it!
You have learned how to compile report cards using Microsoft Excel Template. This template is highly recommended for any school that is still using manual result compilation.
The world is changing, do not let your school be left behind. There are many reasons for you need to stop using manual result compilation in your school.
This Excel Template is not expensive. And fits into every school’s budget. You can get the template with just N10,000 only. Click here to get the template on paystack or click here to message me on WhatsApp.
Discussions
Log in below to have your reviews and comments appear instantly.
Related Guides You May Also Like
Closing Attendance Register Termly
This post, Closing Attendance Register Termly, in one sentence This post, Closing Attendance register termly; provides step-by-step guides on how to correctly close students’ attendance registers for every term. This guide is for schools and teachers that use the traditional (manual) attendance register. However, schools and teachers that use modern attendance system can also benefit […]
School Owner-Administrator Too Lenient? What to do
A school owner-administrator too lenient? Yes, some are; and “uncontrollably” so. The problem is that been too lenient has repercussions, negative ones – for the administrator, staff and the organization. So, when a school owner-administrator is too lenient; what is the right thing to do? In this post, I discuss just that. In addition, I […]
Automated Result Compilation Excel App
What is the Automated Result Compilation Excel App? This Automated Result Compilation Excel App is a Microsoft excel application that helps schools and teachers to quickly compile and prepare many students’ report cards at once. LeadinGuides created the automated result compilation excel app as alternative for low-cost schools who cannot afford the more complex online […]

